SuperBOL File Viewer Premium
SuperBOL File Viewer is a tool for viewing COBOL data files. It supports the following organization types:
SEQUENTIALandLINE SEQUENTIAL;INDEXED;RELATIVE.
These files typically have extensions like .dat, .seq or .idx.
SuperBOL File Viewer is a Premium feature. A free version allows you to view files containing at most 100 records. Beyond that, a license key is required (see Adding a SuperBOL License). Contact superbol@ocamlpro.com for commercial offers.
Prerequisites
COBOL data files cannot be interpreted on their own: their structure is defined by the COBOL program that uses them. To open a data file, you therefore need:
- a COBOL program (
.cobor.cblfile) containing the file declaration in theFILE-CONTROLsection as well as the record descriptions in theDATA DIVISION; - optionally, copybooks (
.cpy) referenced by this program to describe the field structure.
It is therefore necessary to first identify which COBOL program defines the data file you wish to view.
Opening a File
Step 1: Open the Data File
There are two methods to open a data file in VSCode:
- Via the file menu: go to
File > Open File...and select your data file directly. - Via the file explorer: open the folder containing your files with
File > Open Folder..., then double-click the desired data file (for example, a file with a.datextension) in the explorer panel on the left.
Once the file is open, a schema selection window appears in the center of the screen.
Step 2: Select the Defining COBOL Program
Opening the file requires associating a COBOL program that describes its format.
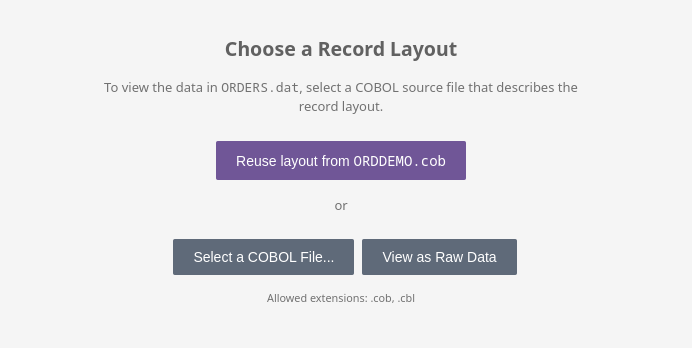
First open: click on
Select a COBOL File...and select the corresponding.cobor.cblfile on your computer. This program can be located in the open project or anywhere else on your disk. The association is saved for subsequent openings of that data file, for the current workspace.Subsequent opens: if the file has already been associated with a COBOL program, a
Reuse layout from <program>button, naming that COBOL file, appears above it, allowing you to reuse the previous association directly.
It is also possible to view the raw file without a COBOL program by clicking on View as Raw Data.
If you do not have access to the corresponding COBOL program, you can still open the file by clicking on View as Raw Data to inspect its raw content.
Step 3: Disambiguation (if necessary)
This step only appears if the selected COBOL program declares multiple files in its FILE-CONTROL section. If only one file is declared, the file opens directly.
The same COBOL program can declare multiple files in its FILE-CONTROL section. In this case, a disambiguation window is displayed, asking you to choose the declaration corresponding to the file you want to open.
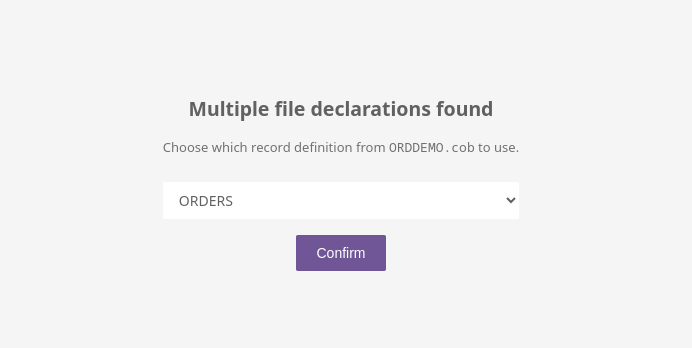
Select the appropriate declaration from the drop-down list, then click Confirm to validate.
Viewer Interface
Once the file is opened with the associated COBOL program, the viewer displays the structured data in a table format, with one row per record and one column per field (columns can be grouped to represent COBOL data groups).
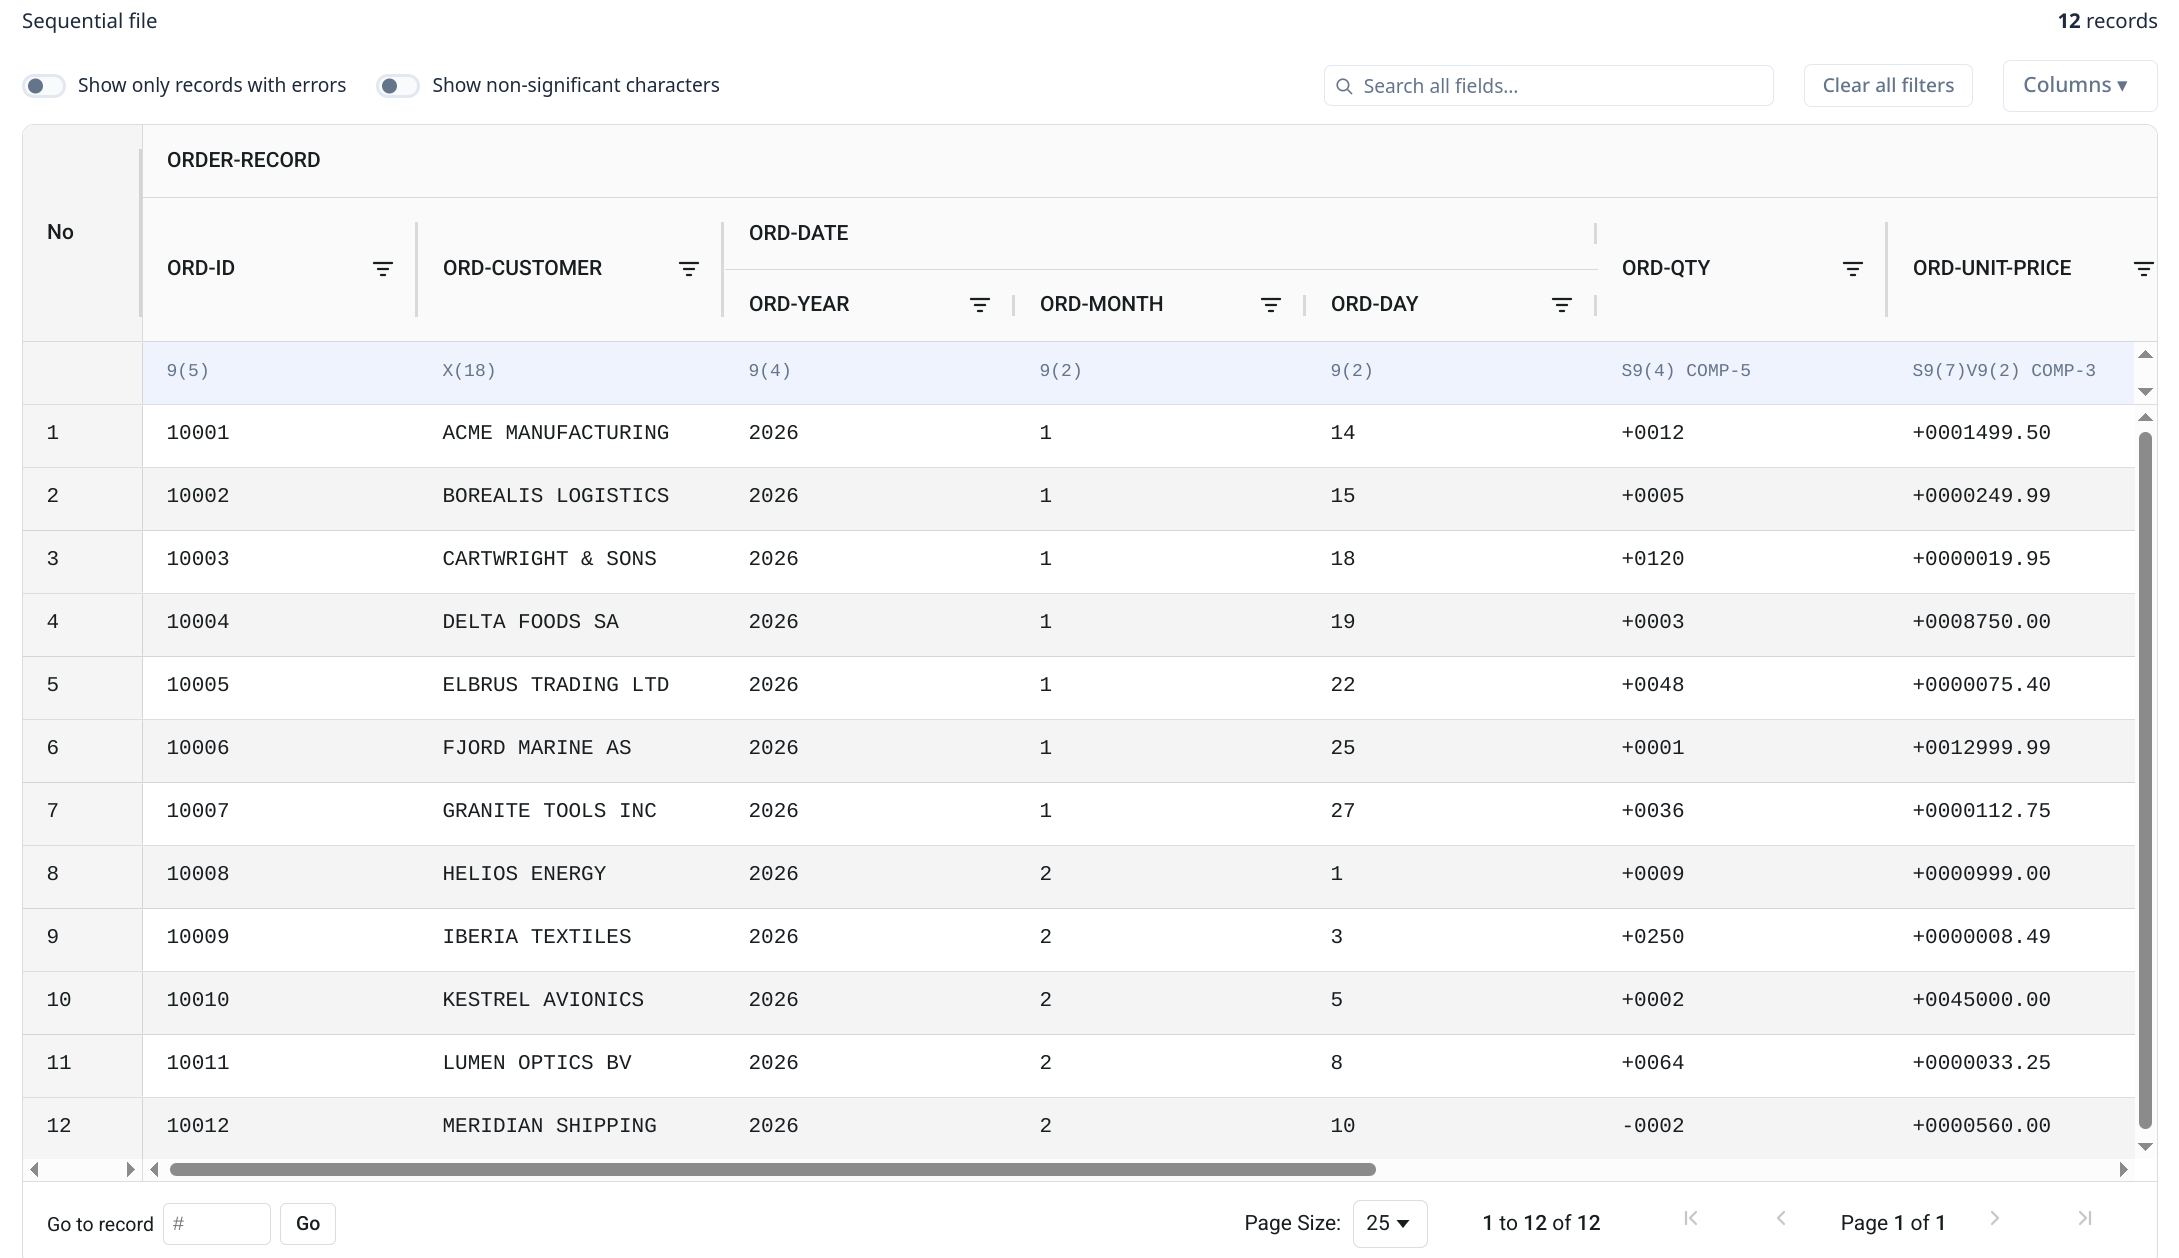
From top to bottom, the interface is divided into three main parts where several interactions are possible:
the header, giving the organization of the file and its total number of records, together with a control panel;
the data table, where the columns can be moved freely, except for the
Nocolumn of record numbers, which stays pinned to the left, and a field cannot be taken out of the group it belongs to;the navigation panel.
The first row of the table is pinned below the column names and gives the PIC clause and the USAGE of each field. Hovering over one of its cells displays additional information about the field, such as whether it is signed and how it is stored.
Tables (OCCURS clause)
A group with an OCCURS n clause is displayed as a table of columns called “occurrences” indexed by an integer.
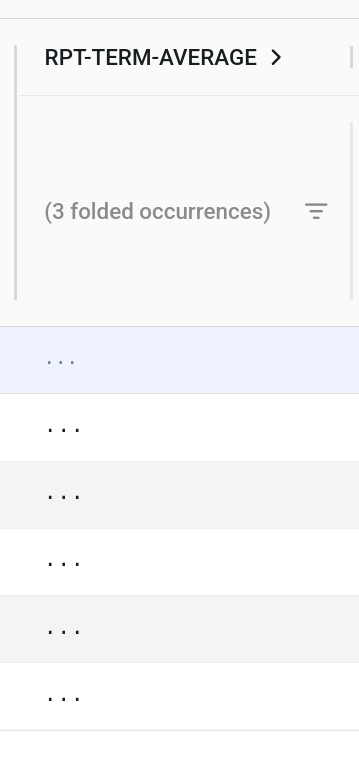
OCCURS table: a single greyed-out column summarizes the occurrences.When the file is opened, this table is folded and displays a single greyed-out column, titled (n folded occurrences) where n is the number of occurrences, whose cells contain “...”. Therefore, the table remains readable when a record repeats a large number of fields.
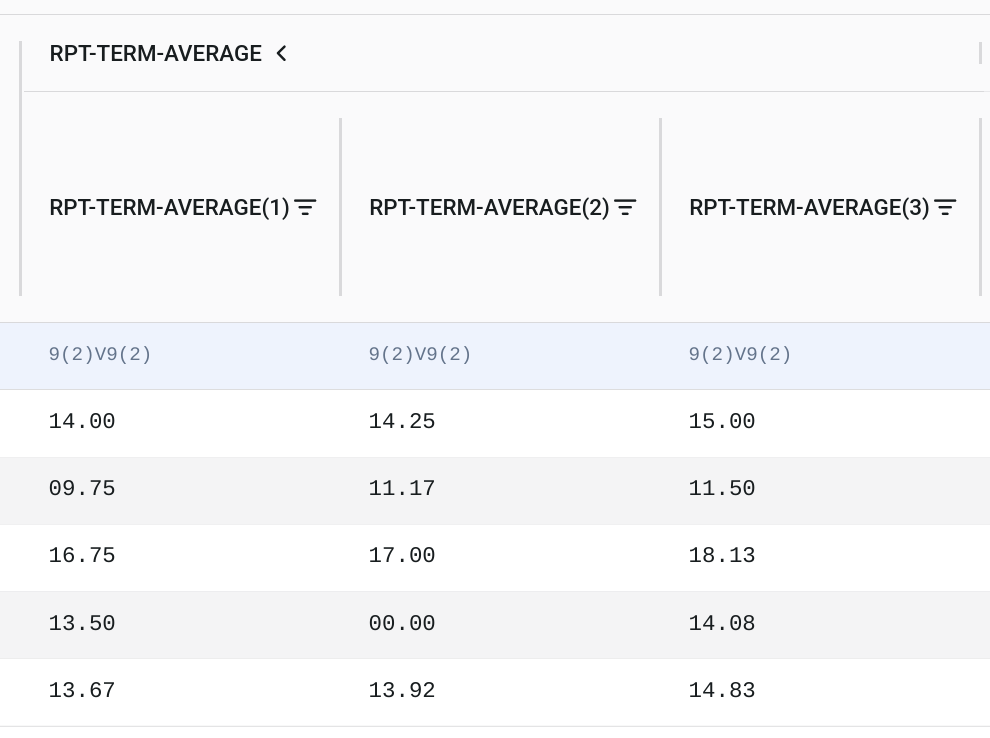
OCCURS table unfolded: one column per occurrence.Clicking anywhere on the group header unfolds it, and clicking again folds it back. Once unfolded, the group replaces that single column with one column per occurrence.
The headers of these columns repeat the field name followed by its occurrence index. The occurrences stay side by side and in the order of their indices when the columns are moved.
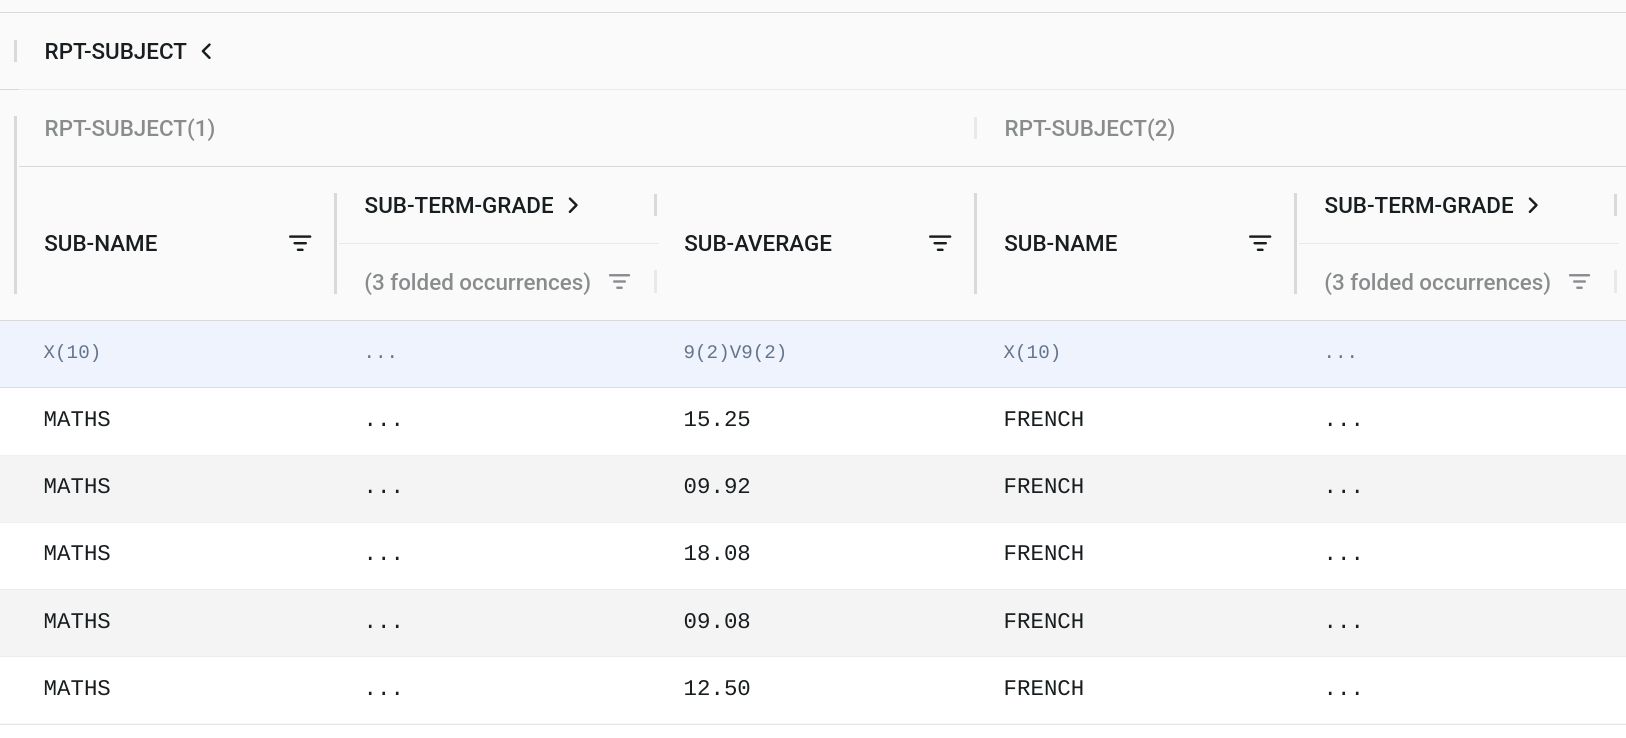
OCCURS tables.In case of nested OCCURS, each occurrence of the outer group has its own copy of the inner group, which is folded when the file is opened as well. Each copy folds and unfolds independently of the others.
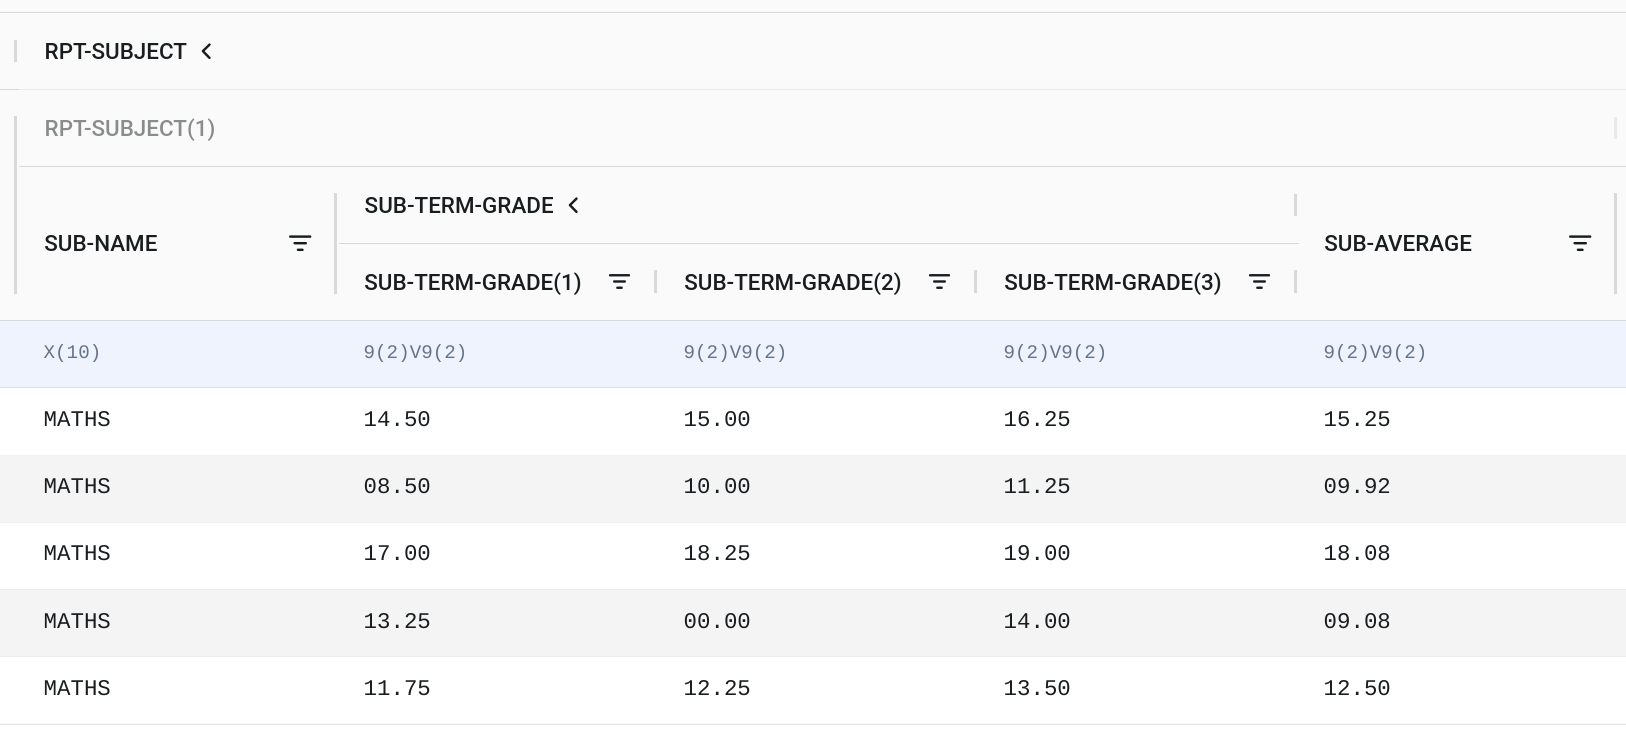
OCCURS table unfolded in the first occurrence of the outer table.The filter of an occurrence column applies only to that occurrence. On the other hand, the global search, that covers all the columns, applies to every occurrence.
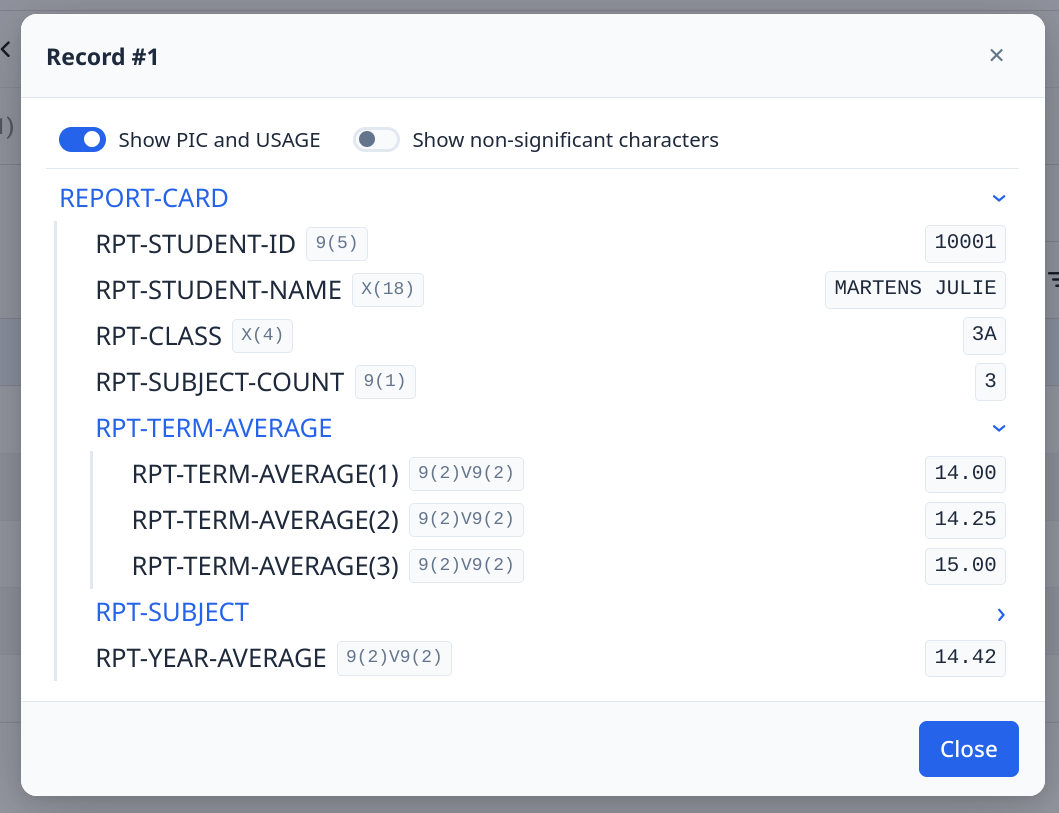
In the record details window, the field names keep their occurrence index.
Data Visualization
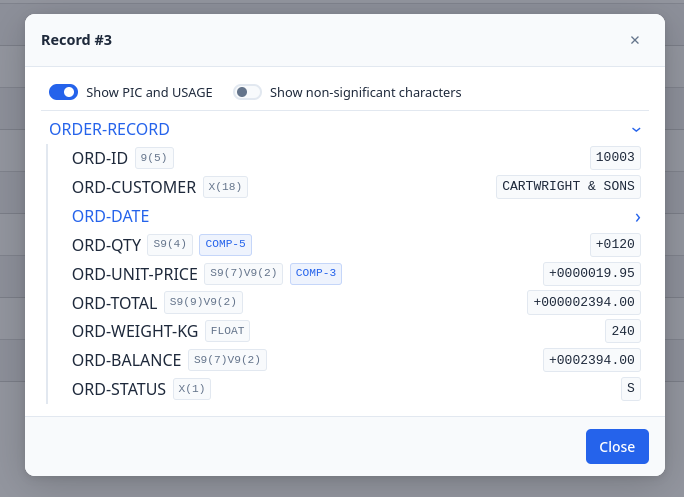
By double-clicking a row in the table, a window opens to display the details of the associated record. The record structure presents the data in a tree format to visually distinguish the different groups. The groups are collapsed when the window opens: clicking on a group name expands it, and clicking it again collapses it.
At the top of the window are formatting buttons:
a
Show PIC and USAGEbutton allows you to show or hide labels, which helps visually lighten the interface;a
Show non-significant charactersbutton allows you to display non-significant characters in the values on the right: for text values, leading and trailing spaces are shown as middle dots (·), and for numeric values the leading zeros are dimmed. Signs are also displayed at the position where they are stored, at the beginning or at the end of the value.
Formatting

At the top left of the main window are buttons to format the data.
Similarly to the previous data details window, you can show or hide non-significant characters using the Show non-significant characters toggle. The same setting applies in both windows: changing it in one of them changes it in the other. Like the column selection, the state of this toggle and that of Show PIC and USAGE are kept for subsequent openings of the viewer.
With the Show only records with errors toggle, you can also filter the view to keep only records containing errors (notably typing errors, when values do not match the specified PIC type). This makes it easy to spot data that needs fixing. Records containing errors are highlighted in the table at all times, whether this toggle is enabled or not.
Data Navigation

At the bottom of the main window is a navigation interface. In order:
a
Go to recordfield allowing you to jump to a specific record number. For example, entering5and clickingGowill take you directly to the fifth record (which will be highlighted). TheEnterkey validates the input as well, and a record number outside the range of the file is ignored;a
Page Sizedrop-down list allowing you to choose the number of records displayed per page;an indicator of the currently displayed record numbers relative to the total (
1 to 10 of 10in the screenshot);an indicator of the current page relative to the total number of pages (
Page 1 of 1in the screenshot), surrounded by buttons to go to the next / previous page or to the beginning / end of the file.
Filtering
Column Set Filtering
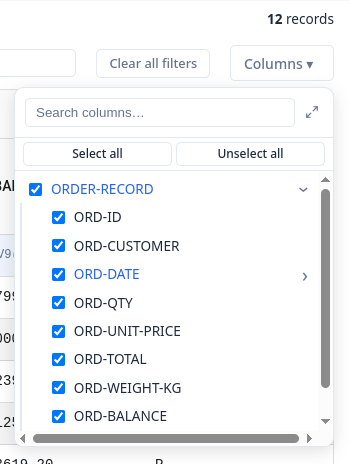
At the top right of the main window is a Columns button that opens a floating panel with the list of fields. The list follows the structure of the record: the fields of a group appear indented under its name.
This allows you to select which columns are displayed or hidden by checking or unchecking the corresponding boxes. Checking or unchecking a group applies to all of its fields at once, and the box of a partially displayed group is shown in an intermediate state. Select all and Unselect all buttons are also present to select and deselect all columns at once.
Unchecking an OCCURS group also hides the column displayed when it is folded, so that the group disappears entirely from the table.
The selection is kept for subsequent openings of the viewer, and the number of hidden columns is displayed next to the Columns button.
A search bar at the top of the panel allows you to search for specific columns.
If you only want to display a small number of specific columns, you can uncheck everything with Unselect all and use the search bar to find and check the columns you need.
A “fullscreen” button at the top right of the floating window also allows for a wider and more comfortable view in case there is a great depth of data.
Column Data Filtering
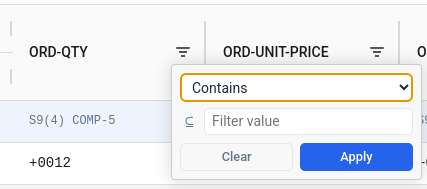
Each column has a “funnel” icon to the right of its name, allowing you to filter the displayed data according to certain criteria.
Whatever the type of the field, the filters are:
Containsto keep only records where the value in the selected column contains the entered text;Starts withwhen the value starts with the input;Ends withwhen the value ends with the input;Equalswhen the value is identical to the input;Blankwhen the value is empty;Not blankwhen the value is not empty.
Comparisons are case-sensitive. The filter is applied by clicking Apply, and Clear removes it.
Global Search

A search bar is available at the top right of the main window. It allows you to search for a value across all columns of the data file (in the same way you would manually search for a keyword in the filter associated with each column): a record is kept as soon as one of its fields contains the searched text, again case-sensitively. Pressing the Enter key validates the search.
The bar is followed by a Clear all filters button that resets all filters, including both global search and column-specific filters.